
An emergency water cut off is crucial for several reasons. It puts an end to the leak. It also halts damage. Most importantly, it lets you safeguard your home from expensive repair work.
In the US, the amount of people who face water damage in their homes is shocking. About 14,000 people face it daily.
Everything begins with a tiny amount of damage. A pipe burst. It then flooded the property’s premises. It takes a very small time for the water to spread everywhere.
What Counts as a Water Emergency?
Not every leak can feel urgent at first. But some situations need immediate action.
Here are common water emergencies:
- Burst or cracked pipes
- Overflowing toilets or sinks
- Broken water heaters
- Leaking washing machines or dishwashers
- Sudden drop in water pressure with visible leaks
If you notice somewhere that water is flowing and not stopping, it is an emergency. Acting quickly protects your home and your wallet.
Where Is Your Main Water Shut Off Valve?
Before learning the steps, it helps to know where the main valve is located. Many homeowners only search for it during an emergency. That delay can cost time.
In most homes, the valve is found in one of these places:
- Near the water meter outside the house
- Inside the garage along a wall
- In a basement or crawl space
- Near the front yard close to the street
Take a moment to check your home today. Ask yourself, do you know exactly where it is? If not, now is the best time to find it and make sure you know where it is, in case of emergency
Fixture-Level Shut-Off Valves: A Faster Fix for Small Leaks
In many cases, you can stop the leak right at the source. That is where fixture-level shut-off valves help.
What Are Fixture-Level Valves?
These valves sit close to the fixture they control. You will usually find them:
- Under bathroom or kitchen sinks
- Behind toilets, near the wall
- Behind washing machines
- Near dishwashers or water heaters
Main Valve vs. Fixture Valve
It helps to know the difference. Each one serves a different purpose.
| Type | Controls | When to Use |
| Main shut off valve | Entire home water supply | Major leaks or unknown sources |
| Fixture shut off valve | Single fixture only | Small, localized leaks |
When to Use a Fixture Valve
A fixture valve is often the fastest option.You can use it when:
- A sink pipe starts leaking
- A toilet keeps overflowing
- A washing machine hose bursts
- A faucet will not stop dripping
How to Turn It Off
Most fixture valves are easy to use. Still, it helps to know what to expect.
- Turn the valve clockwise to shut off water
- Some valves have a small round knob
- Others may have a short lever
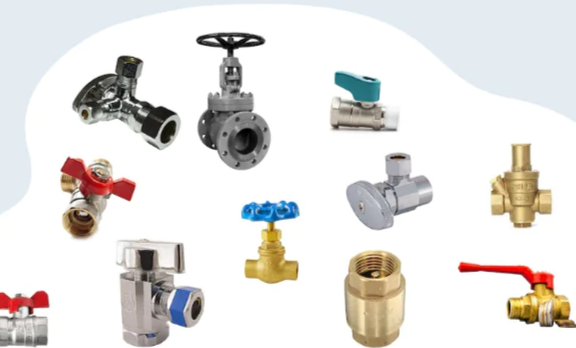
Valve Types Explained: Know What You’re Turning
Credit: https://totvalve.com/types-of-water-shut-off-valves-a-complete-guide/
Different shut off valves work differently.
The Two Main Types of Shut Off Valves
Most homes have one of these two types:
| Valve Type | What It Looks Like | How It Works | Speed |
| Gate valve | Round wheel handle | Turn multiple times clockwise | Slower |
| Ball valve | Straight lever handle | Turn 90 degrees (quarter turn) | Very fast |
1. Gate Valve (Older Style)
Gate valves are common in older homes. You will usually see a round, wheel-shaped handle.
To shut it off, you need to turn it clockwise. And not just once. It takes several turns before the water fully stops.
What to expect:
- It may feel stiff or hard to turn
- It takes more time during an emergency
- It may not fully close if worn out
2. Ball Valve (Modern Style)
Ball valves are more common in newer homes. They are easy to spot because of the straight lever handle.
To shut it off, turn the lever just a quarter turn. That is it. When the handle is perpendicular to the pipe, the water is off.
Why homeowners prefer it:
- Quick and easy to operate
- Less likely to fail
- Ideal during emergencies
How to Tell Which Valve You Have
You do not need tools for this. Just take a look:
- Round wheel handle? It is a gate valve
- Straight lever handle? It is a ball valve
Should You Upgrade Your Valve?
If your home still has a gate valve, you might wonder if an upgrade is worth it.
Here is a simple comparison:
| Factor | Gate Valve | Ball Valve |
| Ease of use | Moderate | Very easy |
| Speed | Slow | Fast |
| Reliability | Can wear out | More durable |
Upgrading to a ball valve can make emergencies easier to handle. Many homeowners in older Los Angeles properties choose this upgrade for peace of mind.
5 Urgent Steps to Handle an Emergency Water Shut Off

Credit: https://cleanline.ca/emergency-water-shut-off/
1. Stay Calm and Act Fast
The first reaction is often panic. Water spreads quickly, and it feels overwhelming. But staying calm helps you think clearly.
Look at where the water is coming from. Is it a pipe, an appliance, or a fixture? If it is a small source like a sink, you may shut off the local valve. If not, go straight to the main shut off.
Every second counts here. Quick action can save floors, walls, and furniture.
2. Turn Off the Main Water Supply
The main valve controls water for the whole house. Once it is off, the flow stops and damage slows down.
How to Turn Off Each Type
For a gate valve:
- Turn the handle clockwise
- Keep turning until it stops fully
- It may take several turns
- Stop when you feel firm resistance
These valves are common in older homes. They can feel stiff, especially if not used often.
For a ball valve:
- Turn the lever one quarter turn
- Move it until it is perpendicular to the pipe
- This position means the water is off
What If the Valve Won’t Budge?
Sometimes the valve feels stuck. This can happen with older or rarely used valves.
Here is what to do:
- Do not force it too hard
- Avoid using excessive pressure
- A broken valve can make things worse
If it does not move, call a professional or your local water utility. They can shut off water safely from the main supply line.
How to Confirm the Water Is Off
Do not assume the water has stopped. Always double-check.
- Turn on a faucet in your home
- Watch the water flow closely
- It should slow down and stop within seconds
3. Shut Off Electricity if Needed
When should you cut power? Use this quick guide.
When to Turn Off Power
Cut electricity right away if you notice:
- Water near wall outlets or power strips
- Wet appliances like washers, dryers, or dishwashers
- Water close to your electrical panel
- Damp ceilings or walls near light fixtures
How to Turn Off the Right Breakers
Go to your electrical panel. It is usually in a garage, basement, or utility area.
- Look for labeled breakers like “kitchen” or “bathroom”
- Switch off the breakers for affected areas
- If labels are unclear, turn off the main breaker to cut power to the whole house
Safety Comes First
Before going near the panel, pause and check the area.
- Never step into standing water to reach the panel
- Wear rubber-soled shoes if the floor is damp
- Use rubber gloves for extra protection
- If water is deep or near the panel, call an electrician
What About GFCI Outlets?
Some homes have GFCI outlets. These are common in kitchens, bathrooms, and garages.
- They are designed to shut off power when water is detected
- You may see a “reset” button on the outlet
- After the area is dry, you can press reset to restore power
Even if a GFCI trips, do not assume everything is safe. Always check for moisture first.
4. Drain Remaining Water From Pipes
Even after shutting off the main supply, some water stays inside pipes. That water can still leak out slowly.
Open faucets around the house to drain the system. Start with the lowest level, like a basement or ground floor. Then move upward.
This helps release pressure and clears leftover water. It also reduces further dripping from damaged pipes.
5. Start Basic Damage Control
Once the water stops, the next step is to limit damage.
Step 1: Document the Damage First
This helps with insurance claims later. Capture clear shots of:
- Wet floors and walls
- Damaged furniture and items
- The source of the leak if visible
Also, record short videos while walking through the space. These details help show the full extent of damage.
Step 2: Remove Standing Water
Now you can start cleanup. Focus on removing as much water as possible.
- Use towels or mops for small areas
- Use a wet/dry vacuum for larger pools of water
- Empty the vacuum often to keep it working well
Step 3: Protect Your Floors
Wet floors can be risky. This is especially true for wood flooring.
- Avoid walking on soaked wood if possible
- Water can weaken boards and cause warping
- Use caution to prevent slips and falls
Step 4: Move Valuables to a Dry Area
Water spreads quickly, so act fast to protect important items. Move these items first:
- Electronics like TVs, laptops, and chargers
- Important documents and papers
- Rugs, cushions, and small furniture
Step 5: Start Drying the Area
After removing water, focus on drying.
- Open windows if weather allows
- Use fans to increase airflow
- Turn on dehumidifiers if available
When NOT to Clean It Yourself
Avoid DIY cleanup if:
- Water is contaminated with sewage or waste
- There is a strong foul smell
- Water comes from outside flooding
- The affected area is large
Experts have the tools to dry and restore your home safely. They can:
- Remove deep moisture from walls and floors
- Prevent mold growth
- Restore damaged materials properly
Quick Emergency Checklist
| Step | Action | Why It Matters |
| 1 | Stay calm | Helps you act quickly |
| 2 | Shut off water | Stops further damage |
| 3 | Cut power | Prevents electrical risk |
| 4 | Drain pipes | Removes leftover water |
| 5 | Start cleanup | Limits long-term damage |
Common Mistakes to Avoid
During an emergency, it is easy to make rushed decisions. Here are a few mistakes to avoid:
- Waiting too long to shut off water
- Ignoring small leaks that grow quickly
- Using electrical devices near water
- Forgetting to drain pipes after shut off
Avoiding these mistakes can save both time and money.
When to Call a Professional
If any of these sound familiar, it is time to bring in experts:
- Water has soaked into walls, floors, or cabinets
- A damp or musty smell stays after cleanup
- The leak source is unclear or hidden
- The shut off valve is stuck, broken, or leaking
- Water damage covers a large area
What Professionals Detect That You Can’t See
Water damage is not always visible. Surfaces may look dry, but moisture can still sit inside materials.
Professionals use tools designed for this:
- Moisture meters check damp levels inside walls and wood
- Thermal imaging cameras spot hidden moisture behind surfaces
- Air movers and dehumidifiers dry areas fully and safely
Why Acting Early Saves Money
Water damage costs can vary a lot. It depends on how fast you act and how deep the damage goes.
| Damage Level | Estimated Cost |
| Minor cleanup | $450 to $1,500 |
| Moderate repairs | $1,500 to $5,000 |
| Severe damage | $5,000 to $16,000+ |
Help With Insurance Claims
Many professional restoration companies, like Revive Pro Restoration, help manage this process. They:
- Document damage with photos and reports
- Work directly with your insurance provider
- Help speed up claim approvals
- Reduce confusion during recovery
How to Prepare Before an Emergency Happens
A few simple steps today can save stress later. Here are practical things you can do:
- Locate and test your main shut off valve
- Label the valve for easy access
- Keep a wrench near outdoor valves
- Check pipes and appliances regularly
- Teach family members how to shut off water
Key Takeaways
Water emergencies can feel overwhelming, but they are manageable with the right steps.
- Quick action reduces damage and repair costs
- Knowing your shut off valve location saves time
- Draining pipes and drying areas prevents further issues
- Avoiding common mistakes keeps the situation under control
- Professional help ensures complete recovery when needed
Every home faces risks at some point. Being prepared turns a stressful moment into a manageable one.
FAQs
What do I do if my shut-off valve is stuck?
Do not force the valve if it feels stuck. Too much pressure can break it and make the leak worse. Try turning it gently with a wrench if needed. If it still does not move, call a plumber or your local water utility. They can shut off the water safely from the main line.
Can I turn off just one fixture’s water?
Yes, most homes have small shut-off valves near sinks, toilets, and appliances. These valves control water to one fixture only. Turning them off is quick and helps stop small leaks without affecting the whole house. This is often the fastest fix for minor issues.
Who do I call if I can’t find my shut-off valve?
If you cannot locate your valve, call a plumber or your local water utility company. They can guide you or shut off water from the street if needed. It also helps to ask a professional to show you the valve location for future emergencies.
Does homeowners insurance cover burst pipes?
In many cases, yes, homeowners insurance covers sudden and accidental pipe bursts. However, damage from neglect or lack of maintenance may not be covered. It is best to check your policy details to understand what is included.How long does water damage restoration take?
The timeline depends on the damage. Small issues may take 2 to 3 days to dry and fix. Larger damage can take several days or even weeks. Drying, cleaning, and repairs all affect the total time needed.